
Quick3DCloset Guide: How to Create a Complete Design in Quick3DCloset Step by Step
🎯 Objective
Learn how to create a complete bedroom in Quick3DCloset step by step: architecture, beams, doors, windows, furniture, bedside tables, wardrobes, shelves, materials, and importing external objects.
1. Creation of the architecture
The first step is to define the room. You can choose between:
Predefined template [1]
✔️ To get started faster.
Manually draw the room layout [2]
✔️ To create the exact outline of the room.

🧱 How to do it
- Select the type of geometry.
- Configure the measurements.
- Click OK to draw the architecture.

2. Create the Beams
Beams are created from the Architecture tab. Quick3DCloset does not have a specific tool for creating beams, but they can be simulated by creating them using the Add pillar tool.

🏗️ Steps
- Go to the Architecture tab.
- Click on Add pillar.
- Configure:
- Measures
- Position
- Elevation
⚠️ Important
The beam Elevation should be the wall height minus the beam Height. 

📍 Placing the beams
To place the beams in their correct position, you need to use the Move Pillar tool. 
🔁 Repeat the process
Add as many pillars/beams as needed until the layout is complete.
✔️ The distribution of the beams will be as follows:

✅ (NOTE: You can see the detailed process for creating beams here: How to create beams in the architecture)
3. Add Doors and Windows
After creating the room, add doors and windows. To do this, in the Architecture tab, use the Add Door and Add Window options.

🪟 Windows
- Select the Add Window option.
- Select the wall where you want to place it.
- Adjust its dimensions to fit the design.
- Select the option: Centered on wall.


🚪 Door
- Insert the door.
- Place it in its correct position.
📍 Final location
Place the door and window on the correct wall according to the plan. The design would look like this:

4. Add main furniture
Start decorating the space. Select the Add bedroom accessory option within the Furnishing tab:

🛏️ Example
Select and place a bed in the desired location.
✔️ You can move or rotate it later if needed.

✔️ It should be in this position:

5. Create and save a Nightstand
Next, we will see how to create a custom nightstand using wardrobe modules.

🛠️ Create the base of the nightstand
- Go to the Furnishing tab.
- Select Add Closet.
- Choose the option: Wardrobe without doors without plinth.

5.1. Set the nightstand dimensions

Adjust:
- General measures
- Width: 50cm
- Height: 50cm
- Depth: 40cm
- Number of modules: 1
Important
Leaves:
- No doors
- No side panel
Then press Next until you reach the Distribution stage.
5.2. Configure the Nightstand
The nightstand is made up of the following elements, which will be added in the Distribution stage:
- A shelf
- A drawer
📚 Add shelf
- Select Shelves.
- Choose the module.
- Add it.
- Set: First gap = 13,1


🗄️ Add drawer
- Select Drawers.
- Double-click with the mouse on the upper 31.2 cm gap.
- Configure the drawer settings.
Additional adjustment
Click the wrench icon to open the space dimension settings, then click the minimum button to attach the drawer to the top of the cabinet.
5.3. Save the Nightstand
When it’s finished:
- Click Save
- Give it a name
✔️ That way, you can reuse it whenever you want.

5.4. Insert the Nightstand into the design
- Press OK
- Select the wall where you want to place it (in our example, the right wall)
- Adjust the distance to the corner:
- Manually
- Or by entering the distance to the corner
- Repeat the process to place a second bedside table on the other side of the bed

6. Create a Closet
The next step is to add the main wardrobe.
🚪 How to do it
- Go to Furnishing → Add closet
- Select the Sliding doors between top and base panels with plinth template
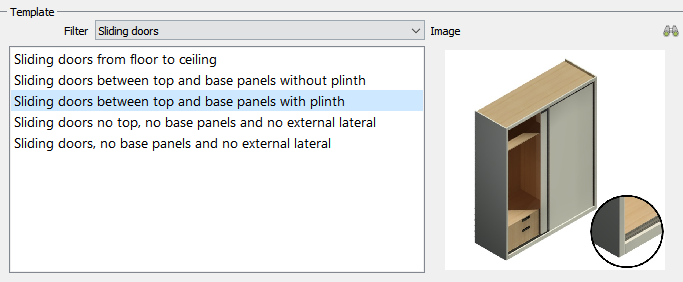
- Set up the wardrobe features as shown in the screenshot on the right:
- Measures
- Number of modules
- Finish panel
- Type of moldings


6.1. Automatic interior distribution
Use a predefined template to lay out the interior of the wardrobe. Move forward to the Auto distribution stage.
✔️ Faster
✔️ Instant professional configuration

After:
- Validate the design
- Place the wardrobe on the lower wall of the room, against the bottom left corner
- ✔️ It should end up in this position:

6.2. Creation of shelves
Next, we’re going to place several decorative wall shelves above the bed.
📚 Steps
- Go to Furnishing tab → Add accessory
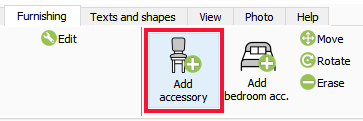
- Inside Legs, select the Shelves
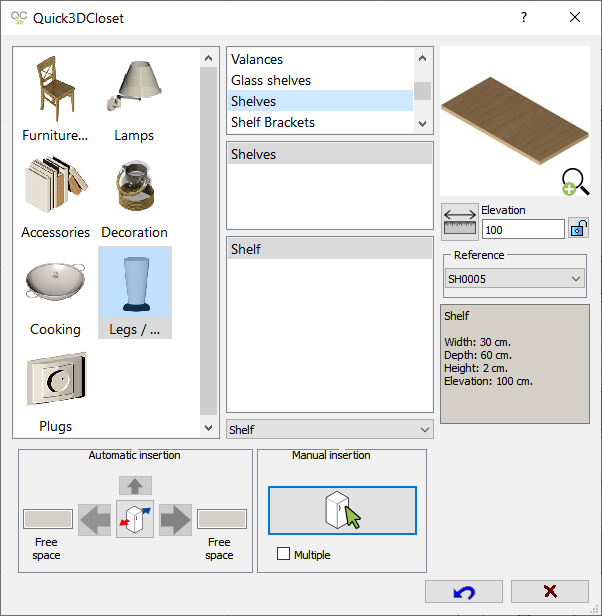
- Adjust its dimensions by clicking on the ruler icon
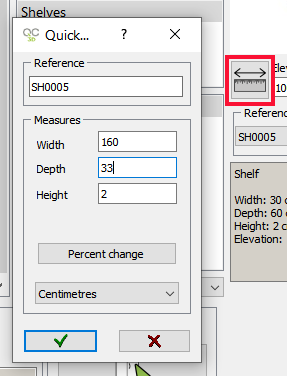
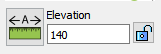
- Set the elevation to your need
- Use Manual insertion option to place the shelf
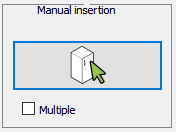


🔄 Adjust orientation
When placing the shelf, you can press the ‘spacebar‘ on the keyboard to automatically align it with the nearest wall. However, if the shelf ends up incorrectly oriented, you can use:
- Rotate
- Move
Then repeat the process to place a second shelf above it with these measurements:

✔️ It should look something like this:

7. Change color and materials
Everything is done from the Photo tab.
🪵 Floor material
- Go to Photo
- Select Floor material
- Choose: Woodfloor 16


🧱 Wall Material
- Go to Photo
- Select Wall material
- Choose: Paints → Yellow 13
- To apply the material to all the walls, enable: Apply to all walls
🧱 Apply the material to a single wall
- In the Wall Material window, disable the option: Apply to all walls
- Choose the new color or material: Paints → White 01
- Select only the desired wall—in our example, the wall on the right

8. Import Objects from SketchUp
Quick3DCloset allows you to import external models.
📦 Steps to add SketchUp objects
- Go to 3D Warehouse: https://3dwarehouse.sketchup.com/
- Download the object you want to add
- In the Projects window, click Import from SketchUp
- Place the object in the design
- Using the Move tool, adjust:
- Position
- Height

🔁 Repeat the process
To add more decorative elements.
✔️ You can create designs as complex as you can imagine.

9. Possible Errors and How to Solve Them
⚠️ Error 1: The beams appear on the floor
Sometimes, even if you set the elevation to 225 cm, the beams may appear at ground level (elevation 0) in the 3D view.
✅ Solution
- Go to the Architecture tab
- Click Edit Pillar
- Select the Pillar
- Adjust the elevation
Repeat on all necessary beams.


⚠️ Error 2: The nightstand is incorrectly oriented
Once the nightstand is placed, it may happen that it is not in the desired direction.
✅ Solution
- Right-click on the nightstand
- Select the Rotate option
- Adjust:
- Direction
- Angle


10. Recommended workflow
- Create room
- Add beams
- Insert doors and windows
- Place the bed
- Create custom nightstands
- Create wardrobe
- Add shelves
- Apply materials
- Import decoración objects from SketchUp
- Review errors and adjust
💡 Best practices
✔️ Correctly adjust the beam heights from the start
✔️ Save custom furniture
✔️ Use materials at the end of the design process
✔️ Add SketchUp objects to improve realism
✔️ Check furniture orientation before rendering
✅ Expected result
- Complete bedroom designed from scratch
- Custom furniture
- Materials applied
- Advanced decoration with SketchUp
- Professional project ready for client delivery